
You're standing in the garage with a new electric dirt bike on its stand, a charger nearby, and no engine noise to tell you whether the machine is ready. The battery may still be partly charged from delivery, the key or cutoff switch may be unfamiliar, and the start button looks deceptively simple.
Learning how to start an electric dirt bike is less about ignition and more about a short pre-flight sequence. You're checking electrical readiness, safety controls, ride mode, and throttle position before the motor gets permission to move. Once you treat the process that way, the first start becomes calm and repeatable.
Table of Contents
- Before You Swing a Leg Over
- Pre-Ride Safety and Inspection
- Powering On the Right Way
- First-Ride Tips for New Riders
- Common Startup Problems and Troubleshooting
- Charging and Battery Care Basics
- Electric vs Gas Dirt Bikes
Before You Swing a Leg Over
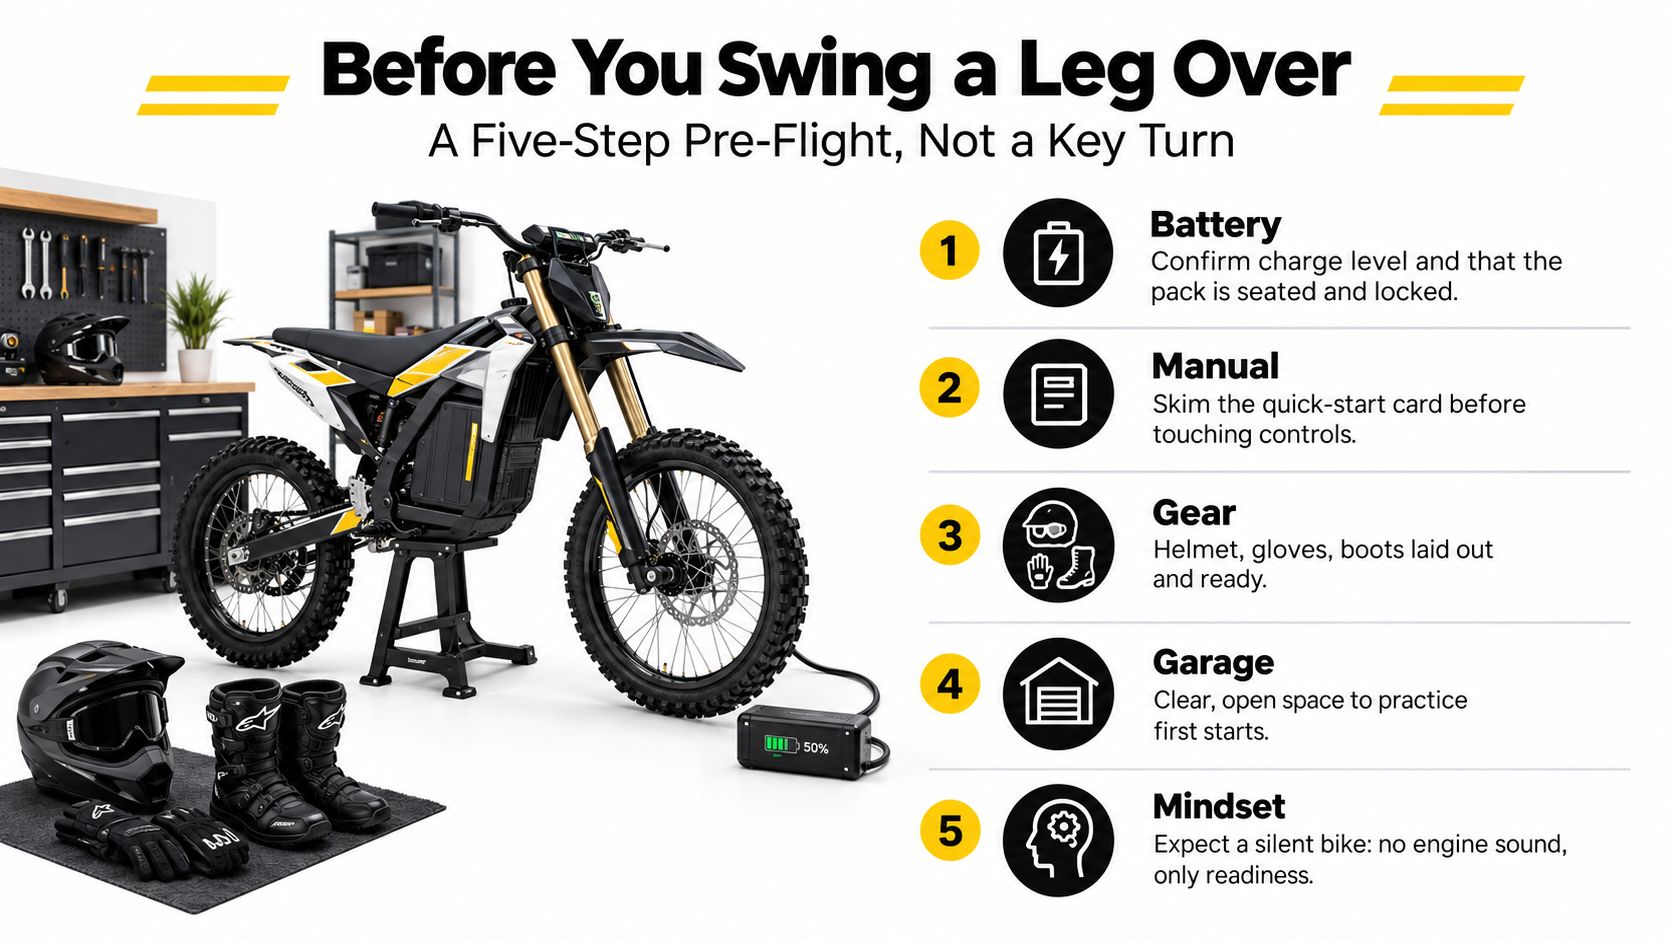
A first start should happen on a flat, open surface, not on a sloped driveway or beside a vehicle. Leave the bike on its stand while you identify the controls, then move it to a clear practice area only after you know where the main cutoff, kill switch, power button, and mode selector are located.
Start with the paperwork and charging equipment. Keep the owner's manual or quick-start card within reach, and use the supplied charger to confirm that the battery has a usable charge. A battery that's half-charged from transport may power the display but still be a poor choice for a first session, especially if you're learning how the bike behaves under load. The cost of an electric dirt bike can vary with battery capacity and equipment, so the exact charge indicators and startup sequence will depend on the model.
Run this mental checklist before touching the throttle:
- Battery: Confirm the pack is seated, connected, and locked into its cradle.
- Controls: Locate the key, main cutoff, kill switch, start button, and ride-mode control.
- Stand: Check whether the kickstand must be raised before the motor will engage.
- Manual: Read the model-specific startup instructions, especially any neutral or safety-interlock notes.
- Riding gear: Put on a helmet, gloves, eye protection, and closed boots before activation.
An electric dirt bike doesn't need an engine warm-up. That's useful, but it also means there's no idle period during which you might notice a loose control, an error message, or an unusual mechanical sound. The inspection happens before movement, so don't rush past it just because the motor starts without noise.
Practical rule: Keep both hands away from the grips while you power up. A relaxed throttle hand prevents an accidental launch.
Pre-Ride Safety and Inspection
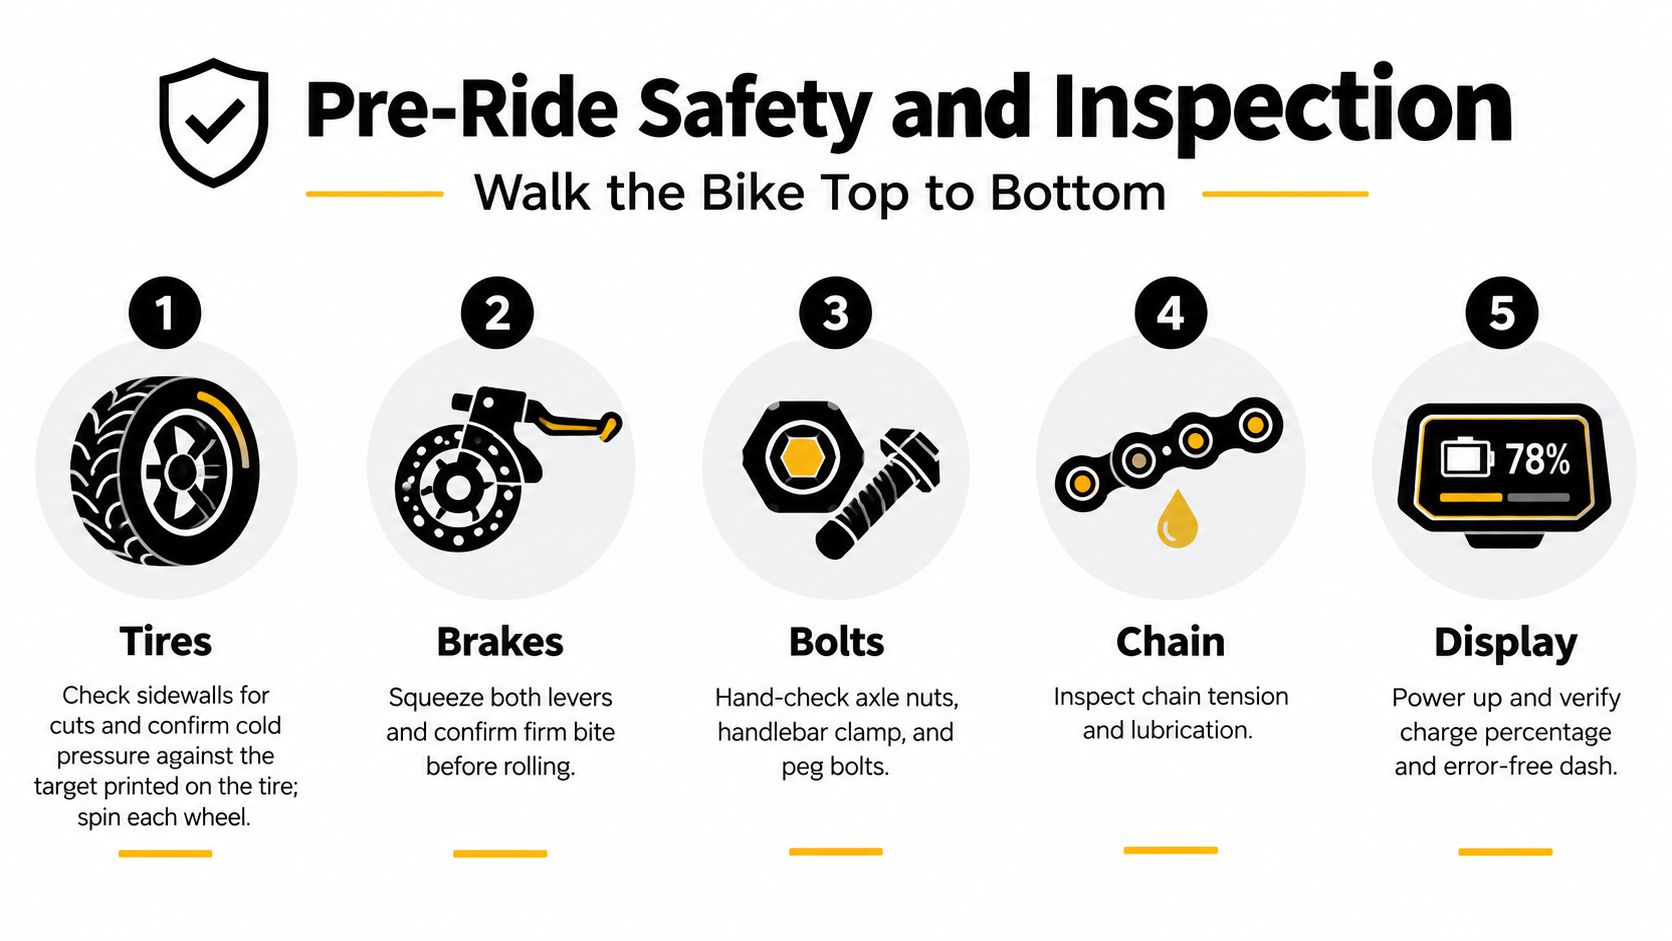
Walk around the bike from the ground up. Start at the tires, because a damaged sidewall or poorly set cold pressure can change the bike's handling before the electrical system is even switched on. Check the pressure against the target printed on the tire or specified in the manual, then spin each wheel to make sure it turns freely without rubbing.
Move to the chain or belt drive. A chain should have the model's specified tension and enough lubrication to prevent dry contact, while a belt should sit correctly without visible damage. Look at the chain slider as well, because excessive wear can let the chain contact parts it shouldn't.
Squeeze both brake levers before rolling. They should feel firm, the pads should have usable material visible through the caliper, and the rotors should look straight. If the rear brake uses a pedal, press it and confirm that it returns fully rather than staying partially applied.
Check the hardware and suspension
Inspect the front and rear axle areas, handlebar clamp, footpeg mounts, and other accessible fasteners. You're not replacing a torque procedure with a glance, but a hand check can reveal a loose nut before it becomes a ride-ending problem. Look around the fork seals and rear shock for fresh oil residue, which can point to a suspension issue that needs attention.
The kickstand deserves its own check. Raise it and release it to confirm that the spring pulls it back cleanly. Some bikes use the stand position as part of their safety interlock, so a stand that hangs low can prevent the motor from engaging.
Finish at the battery housing. Look for cracks in the case, dirt or oxidation on the connector, and a positive lock into the cradle. If you ride with a hydration pack or bottle, a top biking hydration bottles guide can help you choose a setup that stays secure without interfering with your controls. For broader upkeep, keep a model-specific electric bike maintenance routine alongside the owner's manual.
Powering On the Right Way
The sequence matters because each control depends on the previous one being ready. Keep the bike stationary, hold the handlebars normally without twisting the throttle, and work through the system in order.
Confirm the battery first. Make sure the pack is fully seated and locked. Check the charge indicator on the display, or use the battery's status button if the model has one. If the battery isn't connected correctly, the display may remain dark or the system may shut down as soon as you request power.
Turn on the main cutoff. Depending on the bike, this may be a key, a push button, or a tethered magnetic plug. Set it to the active position and look for the expected indicator light or display response. Don't assume that a key inserted into the bike means the high-voltage system is live.
Press the display or controller power button. The dashboard should boot and may run a fault check. Read the screen before touching the throttle. An error code is the bike warning you that a condition needs attention, not an invitation to keep pressing buttons until the motor responds.
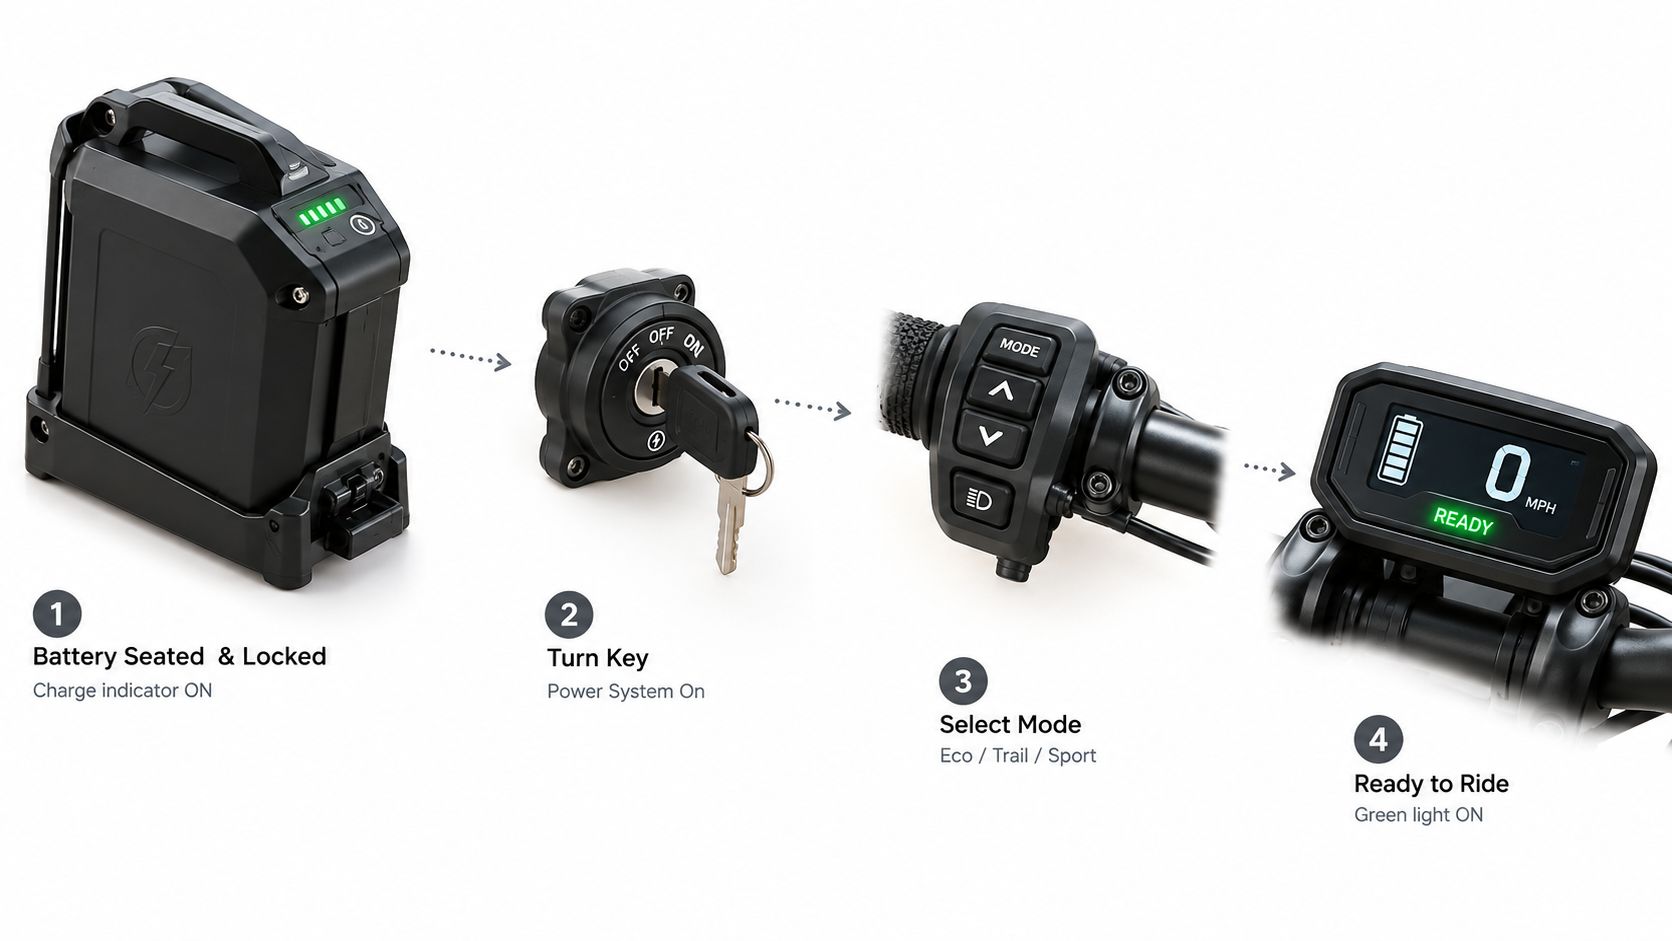
Test the kill switch. Move it to OFF and confirm that the display remains powered while the throttle produces no response. Return it to RUN. This simple test tells you which switch controls motor authorization and can save confusion later.
Select the mildest ride mode. Choose Eco, Beginner, or the lowest available power map. Some dashboards require the bike to leave neutral or zero before the handlebars respond, and the first usable gear may be Eco or first gear. Follow the display and manual rather than forcing the selector.
A live system may show a ready icon, an illuminated mode indicator, or a change in the dashboard. The motor itself may make no sound at all. That silence is normal. The useful confirmation is the display, the active mode, and a correctly positioned kill switch, not an engine-like idle.
First-Ride Tips for New Riders
Start seated with both feet down, the bike pointed into open space, and your throttle hand relaxed. The kill switch should be in RUN, the mode selector should be in Eco or Beginner, and the throttle should be at rest before you apply any input.
Give the throttle one smooth, deliberate roll. Don't blip it repeatedly to “wake up” the motor. Beginner guidance recommends a controlled input after power-up, while electric-bike manuals emphasize that the bike should be stopped, the stand collected, and the controls in the expected position before motor engagement. The motor can respond immediately, even though the bike remains almost silent.
Learn the feel before adding speed
Use a short, straight roll to understand three sensations that differ from a gas dirt bike:
- Silence: There's no engine idle or rising exhaust note to signal acceleration.
- Instant drive: The motor can deliver useful torque as soon as the controller authorizes movement.
- Off-throttle slowdown: Regenerative braking or motor drag may make the bike decelerate more firmly when you close the throttle.
Keep your eyes ahead, not down at the display. Use both brakes gently and practice stopping in the same open area. If the bike slows more than expected when you release the throttle, adjust your body position and inputs rather than reaching for more power.
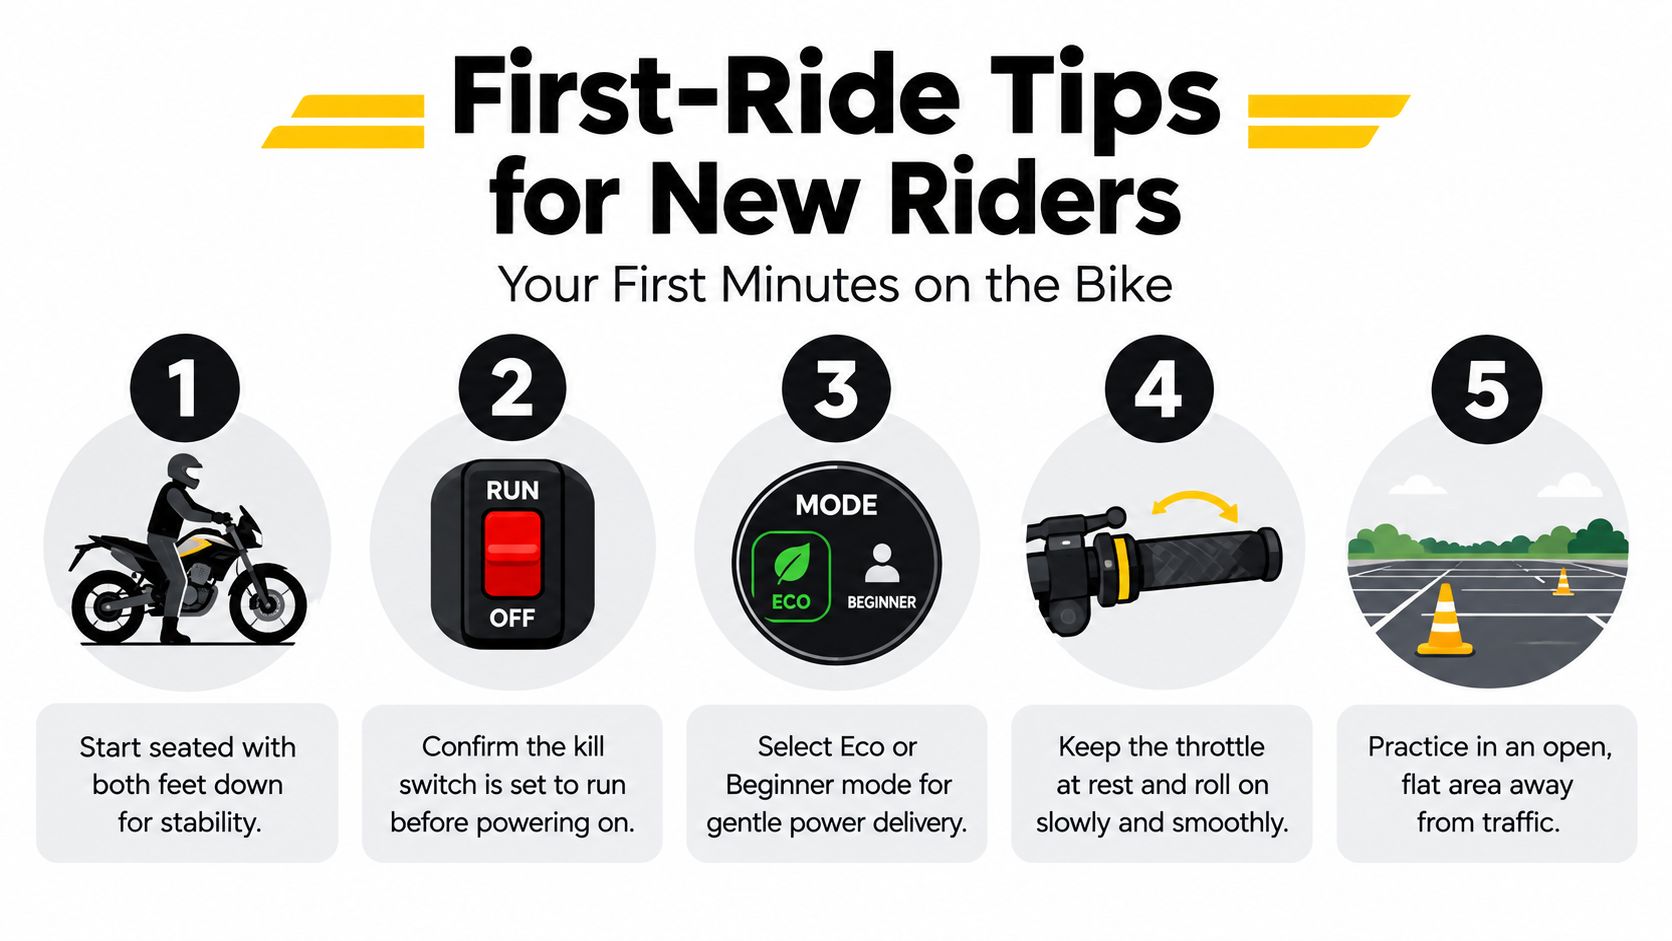
Once straight-line starts and stops feel predictable, introduce a gentle turn, then a mild incline. Save higher modes, rough terrain, and hill starts until you can control the throttle without grabbing it. Before carrying tools or accessories into the field, review these off-road riding essentials and match your equipment to the terrain.
Common Startup Problems and Troubleshooting
A bike that won't move isn't necessarily broken. Startup problems often come from a cutoff switch, safety interlock, battery connection, or controller condition. Troubleshooting guides repeatedly point to low charge, loose or oxidized high-current connectors, battery-management faults, and controller overheating as common causes of no-start behavior or reduced response. Check the simple items before removing covers or replacing parts.
| Symptom | Quickest Field Check |
|---|---|
| Display is completely dead | Confirm the key or main cutoff is ON, then inspect the battery connector and pack lock. |
| Display works but the throttle does nothing | Set the kill switch to RUN, raise the kickstand, confirm the selected mode, and check whether the dashboard still shows neutral or zero. |
| Power comes on and then cuts out | Inspect the battery leads and connectors for looseness or oxidation, then look for a battery or controller fault code. |
| Controller clicks or the bike briefly wakes up | Check the battery charge and allow the battery-management system to recover if the manual describes that condition. |
| Display shows an error code | Stop trying to start the motor and use the manual's code chart before resetting anything. |
| Response becomes weak after riding | Let the system cool and check for controller temperature warnings or power limiting. |
The display-on, no-throttle symptom deserves careful attention. Many models use a stand sensor, neutral condition, brake input, or mode lock to prevent movement. Confirm each condition in the manual instead of bypassing a sensor, because an interlock is there to prevent an unintended launch.
If the bike has no life at all, start with the cutoff and connectors, not the controller. A loose connection can look like a major electronic failure, while repeatedly pressing the power button won't repair a poor battery connection. Stop if you see damaged wiring, heat marks, swelling, or a cracked battery case, and arrange professional service.
Charging and Battery Care Basics
Battery care is mostly a matter of building a consistent loop: ride, cool, charge, store. Use the manufacturer-supplied charger, place the bike in a dry area, and let the pack cool after riding before connecting it. Charging a hot battery immediately after a demanding session adds unnecessary stress to a component that already deserves careful handling.
Before plugging in, inspect the charge port for mud, grit, or moisture. Check the cable for cracked insulation, bent contacts, or damage near the plug. Never force a connector into place, and don't charge if the port or cable is wet.
For longer storage, avoid leaving the battery completely empty or continuously held at full charge. A moderate state of charge, roughly 30% to 80%, is recommended in the provided charging guidance for extended storage. Keep the bike or removable pack in a temperature-stable, dry space rather than a garage that swings from freezing conditions to heat.
Build the habit around the ride
- After riding: Park safely and give the battery time to cool.
- Before charging: Check the pack, port, and cable for visible damage or debris.
- During storage: Keep the battery dry and at a moderate charge level, following the model's manual.
- Before the next start: Confirm the charge indicator instead of assuming yesterday's charge is still available.
A charge indicator is also a diagnostic tool. If the level drops unexpectedly, the bike cuts out under load, or the charger behaves differently from usual, stop treating the issue as a simple startup mistake and inspect the battery system.
Electric vs Gas Dirt Bikes
For a new owner, the important comparison isn't which power source is more fashionable. It's how each machine fits the place, duration, and type of riding you do.
| Category | Electric Dirt Bike | Gas Dirt Bike |
|---|---|---|
| Routine maintenance | No oil changes, air filters, or spark plugs, though the drivetrain, brakes, suspension, and fasteners still need attention | Requires engine-related service as well as drivetrain, brake, suspension, and fastener checks |
| Noise | Near-silent operation makes quiet private-property practice more practical | Engine noise can limit where and when you ride |
| Power delivery | Strong low-speed response with no clutch operation and no engine vibration | Familiar clutch and engine response, with power building through the engine's operating range |
| Refueling | Requires charging and sensible battery planning | Fuel can be added quickly when a suitable supply is available |
| Weight distribution | The battery places substantial mass within the chassis, changing how the bike feels in turns and over obstacles | Engine, fuel, and exhaust components create a different balance and handling response |
| Best fit | Backyard practice, private trails, and shorter off-road sessions where quiet operation matters | Long ride days, remote riding, and sanctioned racing supported by a broad parts ecosystem |
Electric dirt bikes can simplify ownership, but they don't remove responsibility. You still need to inspect the machine, manage charge, confirm local trail rules, and use the correct mode for the rider and terrain. Licensing and access can depend on how local authorities classify the bike, not solely on whether it uses a battery.
Gas remains attractive when fast refueling, extended range, or competition support matters most. Electric makes a strong practical case when quiet riding, home charging, and reduced engine maintenance matter more than long-distance convenience.
Campus EV focuses on reliable electric powersports, including the Campus E1 electric side-by-side UTV, for work and recreation around farms, ranches, worksites, warehouses, and private property. Visit Campus EV to explore electric utility vehicles and see how a quieter, lower-maintenance platform could fit your daily riding or hauling needs.