
You walk out at six in the morning, a foot of snow sits on the driveway, and the electric side-by-side in the barn is the only machine that turns over without a block heater. It hauled fence posts all summer and ran the hunting lease in October. The question now is whether it can push snow, and how much of it, before the pack gives out a quarter mile from the house.
Short answer: an electric UTV snow plow earns its keep on short, repeatable routes that stay within reach of a charger, and it struggles on long uninterrupted runs. Driveways, farm lanes, barn aprons, loading areas, trails and hunting access roads are its natural territory. Drifts taller than the blade, routes that never come back past an outlet, and heavy wet snow on an overloaded front axle are where owners get into trouble.
Snow removal isn't a side job on most properties. The Federal Highway Administration reports that winter road maintenance accounts for roughly 20% of state transportation-department maintenance budgets, and that state and local agencies spend more than $2.3 billion a year on snow and ice control, work that had already moved onto plows fitted to utility vehicles by the 1920s. A property owner runs the same job at a smaller scale with a smaller machine.
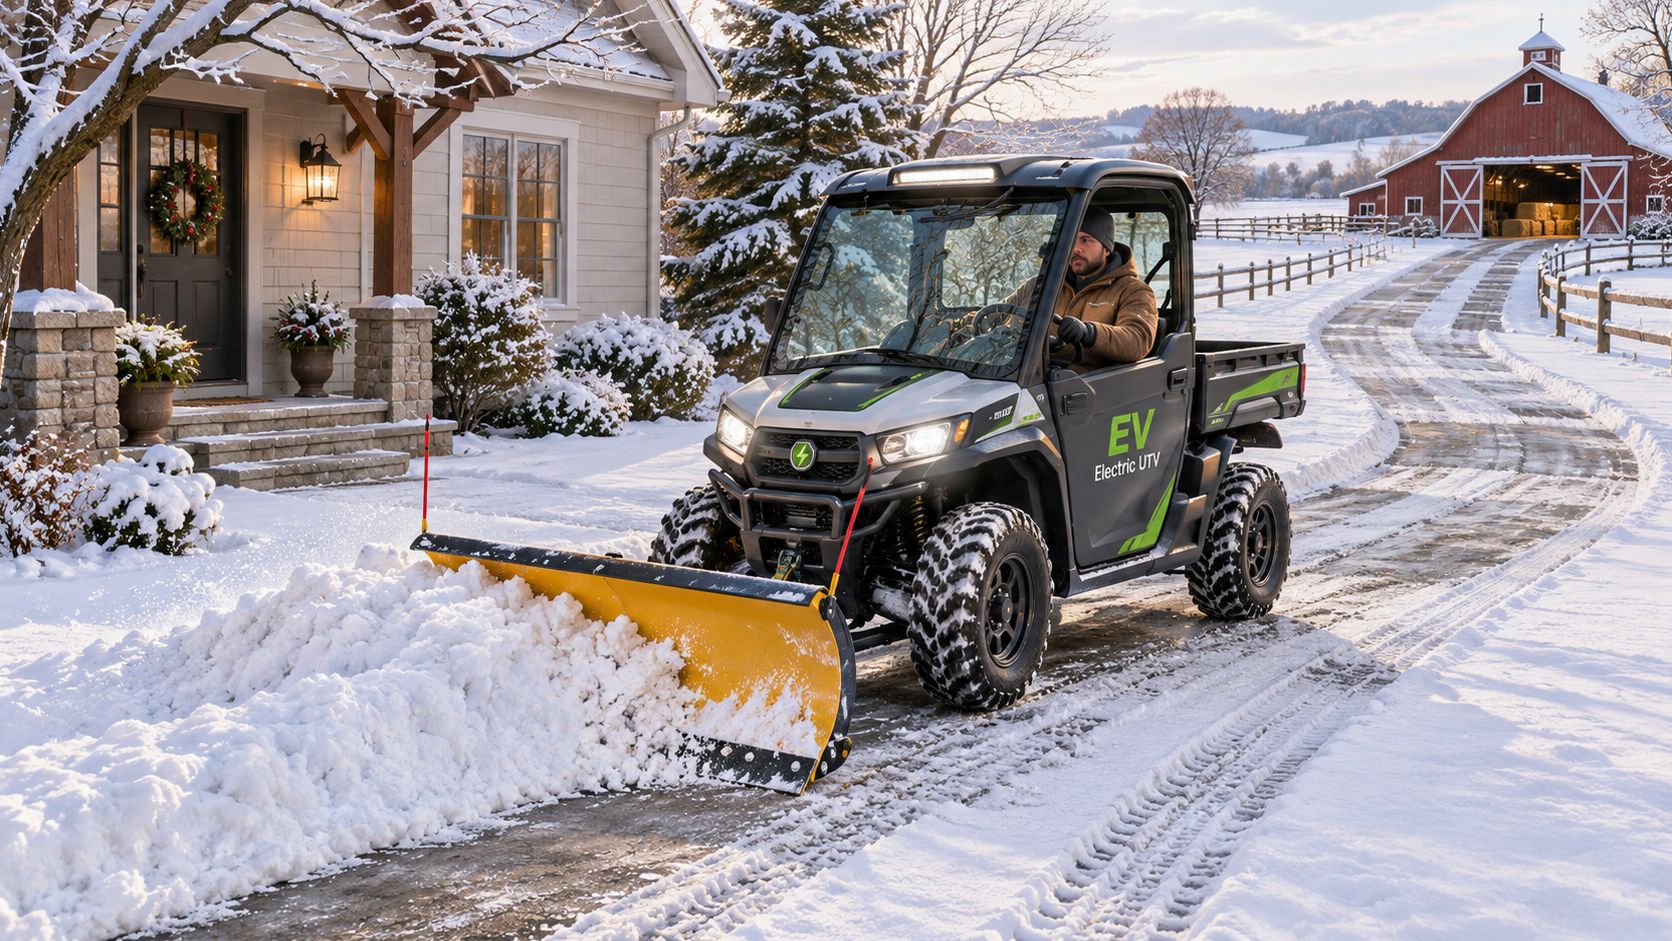
Two limits decide whether the pairing holds up, and neither of them is motor power. The first is cold battery capacity: a lithium pack below freezing surrenders usable energy long before it surrenders volts, and plowing is the heaviest duty cycle the machine will ever see. The second is front-axle loading: blade, mount, push frame and the snow rolling off the moldboard all sit ahead of the operator, and that mass is what bends structures and lightens steering.
The buying lens follows from those two. Traction in 2WD or 4WD, blade width measured against the UTV's track, lift capacity under a wet load, and whether a charger exists where the machine parks after a storm. Before you open a compatibility checklist, measure four things: route length in feet, storm frequency for your area, typical snow depth, and distance from the route to the nearest outlet. Those four numbers eliminate more machines than any spec sheet will.
Table of Contents
- Compatibility Checklist and Blade Width Sizing
- Cold-Weather Battery Limits and Realistic Plowing Range
- How to Plow Efficiently on Packed and Deep Snow
- Planning Routes and Logging Real Plowing Energy
- Common Plowing Problems and How to Fix Them
- Confirm Your Setup Before the Next Storm
Compatibility Checklist and Blade Width Sizing
Start with the table, not the brochure. Every row here has a real reference point, and every row is one you can verify before money changes hands.
| Check | What to verify | Reference point |
|---|---|---|
| Mount system | Receiver or frame mount matches your UTV | Manufacturer-approved kit only |
| Blade weight | Total weight added to the front of the vehicle | Blade maker's listed weight |
| Front-axle capacity | Blade weight plus snow and ballast stays under the rating | Owner's manual, front-axle rating |
| Total payload | Plow, cargo, passengers and ballast combined | Door sticker or manual payload rating |
| Lift or winch power | Electric lift raises the blade under load without strain | Actuator rating and wiring spec |
| Blade width | Fits the route width and the UTV track | Blade maker's listed width, plus track width from the owner's manual |
| Tire pressure | Stays within the tire maker's approved range | Tire placard |
| Maximum speed with blade raised | Speed limit for travel with the blade up | Plow instructions |
Where the audit goes wrong
Electric drivetrains hide overload. Instant torque at zero rpm walks the machine forward with no revving, no slipping clutch, no audible protest, so the seat-of-the-pants signal that tells a gas owner something is wrong never arrives. Published fitment guidance stresses matching the mount to the vehicle and respecting manufacturer limits, and it notes that ballast improves traction while simultaneously reducing stability angles once the machine is loaded. USDA UTV guidance makes the same point from the work side: stay inside the load-carrying capacity and use appropriate rollover protection.
The blade, the mount, the snow load, the ballast and the cargo all stack onto that quiet, effortless feel. A front axle can be past its rating while the motor is barely working.
Run the checks in this order
- Confirm the mount. The push frame or receiver must be a manufacturer-approved kit for your exact model and year. Adapters exist; engineer-approved load paths are better.
- Add blade weight. Use the blade maker's listed figure, not a shipping estimate.
- Add ballast. Rear weight helps traction and counts against payload. Weigh it or calculate it; don't guess.
- Add cargo and the expected snow load. Wet snow rolling off a wide moldboard can weigh more than the blade itself.
- Compare the total against the front-axle rating and the payload rating separately. Passing one does not mean passing the other.
If any row lacks a verified number, stop there and ask the dealer or the manufacturer for it in writing. A missing front-axle rating isn't a formality.
Blade width by route type
Width is a route decision, not a status symbol. A narrow blade for a barn approach or a path between buildings needs more passes but keeps peak load down and steering light. Mid-width suits a standard residential driveway where you have room to push. The widest blade the axle allows makes sense on an open yard, a long straight lane or a parking pad with clear space at the edges.
Wider is not automatically more productive. A wide blade raises windrow resistance and pulls more current, and on a lighter machine it can stall forward progress or spin the tires. Check the lift under load too: raise the blade at idle, then again with wet snow on it. Wiring and line speed matter as much as the rating, so look at UTV winch accessories if your system runs the blade off the winch rather than an actuator.
Finish with one test pass on a short stretch. Steering stays light, the lift holds, the machine tracks straight with the blade angled. If any of those three fails, the setup is wrong, not the technique.
Cold-Weather Battery Limits and Realistic Plowing Range
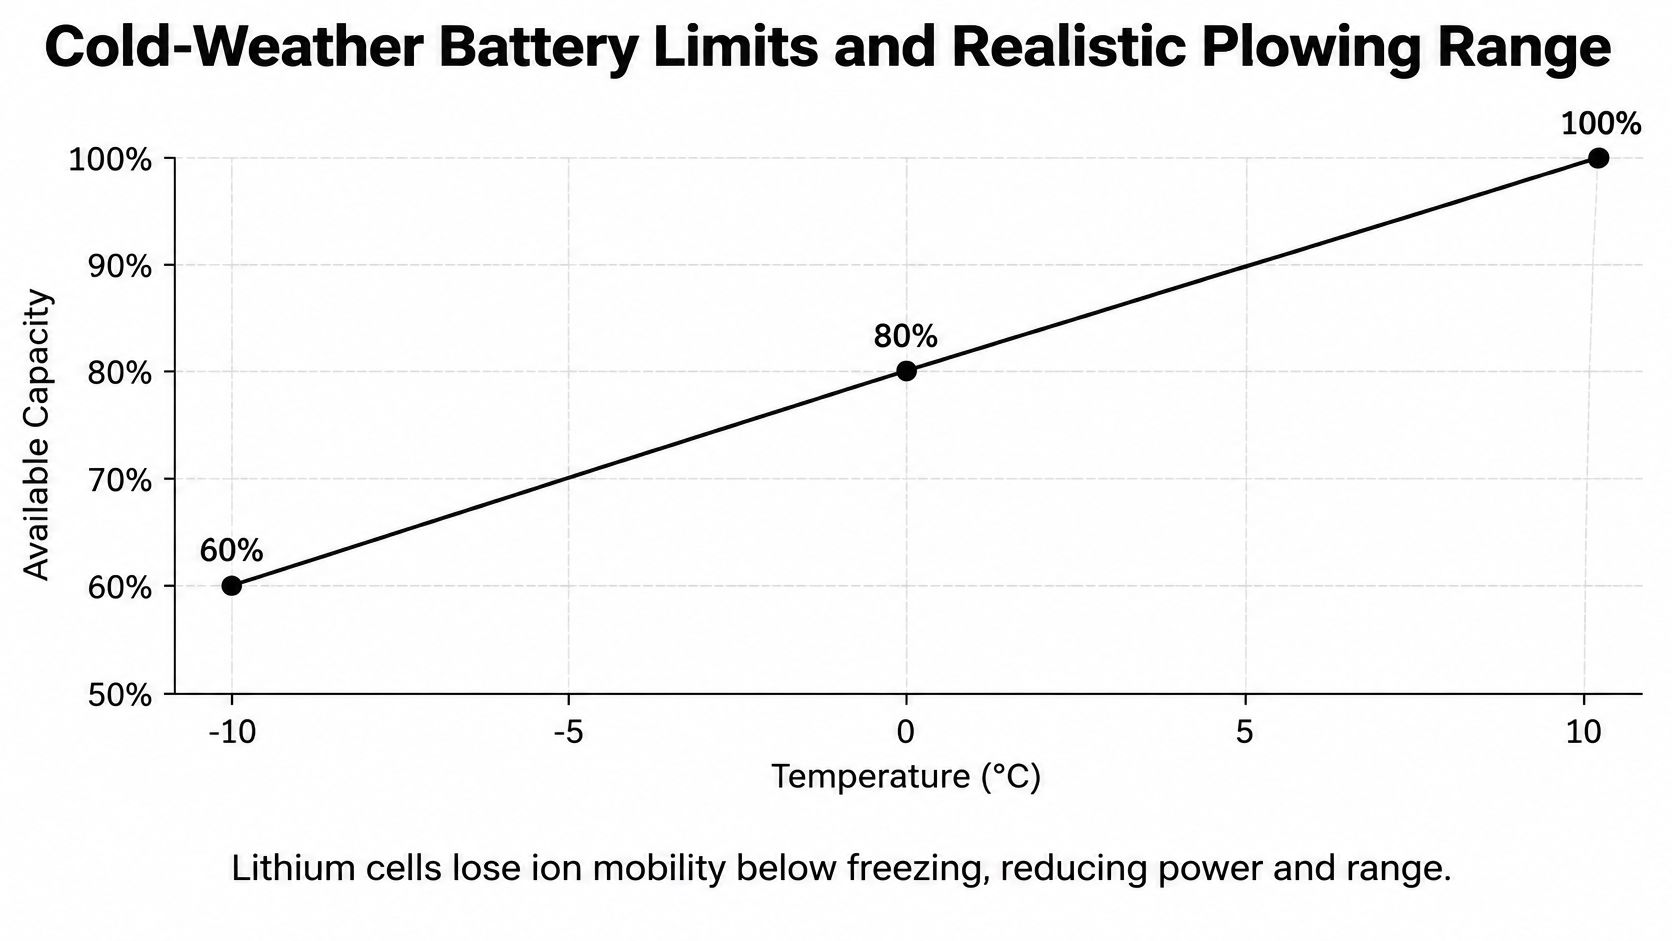
The motor isn't what limits an electric plow in February. The pack is. Lithium-ion cells lose ion mobility and gain internal resistance below freezing, which cuts both available discharge power and usable energy, according to a cold-weather lithium battery review. That review reports tested batteries retaining approximately 77% of their room-temperature energy capacity at -10°C (14°F) under a 1C discharge rate, with a second cited study measuring about 75% usable energy at -10°C compared with 25°C.
What the pack actually delivers in the cold
| Condition | Usable capacity | Planning note |
|---|---|---|
| Room temperature, about 25°C | 100% of rated capacity | Baseline for storage and charging |
| Cold, -10°C (14°F), 1C discharge | About 77% of rated capacity | Reserve roughly a quarter of the pack |
| Cold, -10°C, second study | About 75% of usable energy versus 25°C | Confirms the same loss range |
| 72 V, 150 Ah pack, about 10.8 kWh nominal | About 8.1 to 8.3 kWh available at -10°C | Subtract plow, lights and repeated starts |
| Advertised 60-mile range | Travel figure, not a plowing runtime | Use for transit, not snow duty |
Do the arithmetic on a common pack size. A 72 V, 150 Ah battery is about 10.8 kWh nominal. At the cold-weather retention figures above, that leaves roughly 8.1 to 8.3 kWh of chemically available energy before the plow actuator, drivetrain, tires, lighting and repeated starts take their share. Snow depth, wet snow, blade angle, incline and 4WD all push the load higher from there.
Why the range figure misleads
The advertised 60-mile range describes steady travel on a mild day, not a low-speed push against traction resistance with an actuator cycling every few minutes. Plowing is a high-load, low-speed duty cycle, and it drinks energy in a way that flat-road mileage never does. Treat the range number as transit planning only.
The operating routine matters as much as the chemistry. Store the UTV indoors when you can, start the job with a warm battery, precondition while still connected to shore power if the system supports it, and recharge promptly after use rather than letting the pack sit depleted in freezing weather. On charging behavior and pack care, the Campus EV performance guide covers the habits that keep capacity from drifting downhill over a winter.
Reserve rule: plan every route to finish with enough energy to get back to the charger, plus a margin for the wet, compacted snow that always shows up on the second pass.
Deep discharge in freezing conditions is the expensive mistake. It's cheaper to make one more loop than to tow the machine.
How to Plow Efficiently on Packed and Deep Snow
Traction is the variable that decides whether motor torque turns into pushing force or into wheel spin. The NREL snow and ice control field guide treats traction setup as the first thing to get right, ahead of blade technique, and that order is correct.
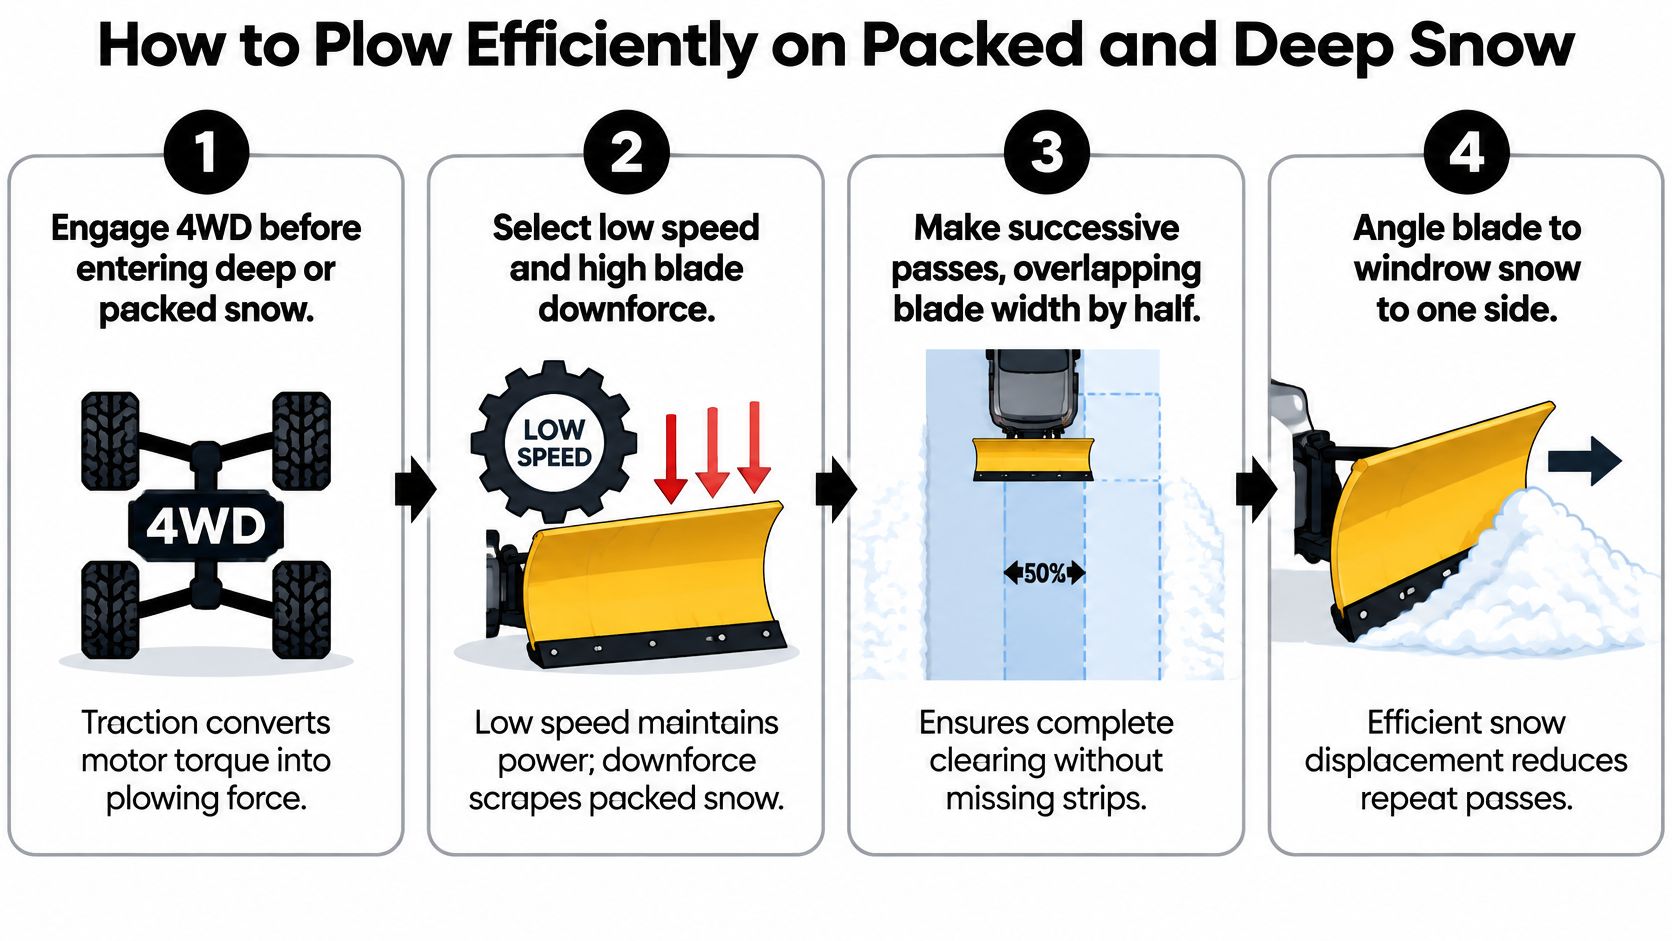
- Engage 4WD before you enter the deep stuff. Shifting into four-wheel drive after the wheels are already spinning on packed snow loses the momentum you needed. Do it at the edge of the drift, not in the middle.
- Pick low speed and hold it. Steady forward momentum beats stop-and-restart against a loaded blade every time, because each restart costs a fresh surge of current and a fresh bite of traction.
- Angle the blade slightly. A few degrees of angle rolls snow off to one side and cuts lateral resistance. A blade set square plows a growing pile in front of you and loads the machine harder with every foot.
- Take shallow passes. Several passes at half depth move more snow per kilowatt-hour than one deep push that stalls. Size the blade to the chassis, suspension, winch and the manufacturer's approved accessory capacity; an oversized blade overloads the front structure and raises steering effort even when the motor has torque to spare.
- Set tire pressure and ballast on purpose. Lower pressure inside the tire maker's approved range enlarges the contact patch, and controlled rear ballast raises normal force on the drive tires, which raises available tractive force roughly in proportion to the weight added, provided axle and payload limits hold.
- Stop before the wheels spin. Spin burns battery energy, polishes snow into ice that you'll fight again tomorrow, and cuts the area you clear per charge. Back off the throttle the moment you feel light chop under the tires.
- Don't use the winch as a traction substitute. Winching through a snow bank puts a high instantaneous electrical and mechanical load on the machine and accelerates voltage sag in cold conditions. The winch lifts the blade; the tires move the snow.
Controlled speed, sensible ballast and 4WD clear more ground per kilowatt-hour than aggressive throttle ever will.
Track one number across the winter: cleared area per kilowatt-hour. It tells you faster than any gauge whether a change in technique helped.
Planning Routes and Logging Real Plowing Energy
Ask an owner how far they get while pushing snow and the answer rarely matches the spec sheet, because plowing energy is set by the snow, not by the thermometer. Independent winter testing of a much larger electric snow-clearing vehicle, run at temperatures from roughly 0 to -30°C, found limited range loss because the battery was actively maintained at 15 to 20°C. Energy use still swung enormously with duty cycle: 26.25 kWh/km while removing 50 to 60 cm of compact snow, against roughly 3.6 kWh/km in other test conditions, per the Minnesota DOT evaluation of electric snow-clearing equipment.
That gap is the whole story. Snow density, depth, blade angle, tire traction and repeated pushing move the number far more than air temperature alone. Timing does too: the FHWA road weather program reports that real-time weather and pavement information can reduce statewide snow-and-ice-control expenses by roughly 10% to 20% by helping supervisors decide when and where to send crews, plows and salt trucks. A property owner makes the same call every storm, just with one machine.
The field log to keep for every storm
Write these down after each event. Six storms in, the log replaces guesswork with a real number.
- Starting state of charge: percentage before the key turns.
- Ambient temperature: at the start of the job, not the afternoon high.
- Snow depth and type: powder, wet, wind-packed, drifted.
- Blade width and angle: the setting you ran.
- 2WD or 4WD: and how much of the route ran in each.
- Watt-hours consumed per cleared lane: or the percentage of pack used divided by lanes cleared.
Size the reserve from the log, not from the manual. Keep enough energy for the return trip plus a margin for wet or compacted snow, and treat overnight storage, preheating and post-work charging as separate line items, because they draw from different budgets. If the driveway is long enough that the machine can't finish and get back, split the route into loops with a planned recharge point in the middle. The Campus EV efficiency guide walks through the consumption habits that shift those numbers in your favor.
Common Plowing Problems and How to Fix Them
| Symptom | Likely cause | Fix |
|---|---|---|
| Motor slows or cuts out mid-push | Cold battery or deep discharge | Warm the battery, reduce blade load, recharge sooner |
| Wheels spin on packed snow | Insufficient traction or excess speed | Engage 4WD, lower speed, add rear ballast within limits |
| Lift or winch strains | Blade overload or winch used for traction | Reduce blade load and clear in shallow passes |
| Steering feels heavy | Oversized blade or front-axle overload | Switch to a narrower blade and recheck the front-axle rating |
| Blade skips over ice | Blade angle too steep or ice layer | Lower the blade angle and scrape in passes |
| Range drops sharply | Wet, dense snow in cold conditions | Plan extra reserve and shorter loops |
Some fixes land on the next charge and some take a full season. Changing how you warm the pack, softening your throttle and shortening loops show up immediately. Ballast placement, blade width and mount choice are one-time setup decisions, so get them right before the first storm rather than mid-February.
A worked example makes the connection plain. Say a quarter-mile driveway stalls out halfway through, every time, on the second pass. The first suspicion is the battery, and it may be part of it: a cold pack, a long run, repeated actuator cycling. But the second pass is also when the windrow builds, and a blade that's too wide for the front axle turns that windrow into drag, which turns into current draw, which turns into voltage sag on an already cold pack. Two causes, one symptom. The fix is a narrower blade or a different pass pattern, then a warmer start, not more throttle.
When the same symptom shows up twice in one storm, stop and reassess the setup. Pushing harder through a mechanical limit breaks parts, and pushing harder through an electrical limit just gets you a walk home.
Confirm Your Setup Before the Next Storm
Confirm the setup on paper before the first storm, not after the first failed push. Run the compatibility table against your actual machine, then set blade width and battery reserve from your own field log rather than from an advertised number.
The Campus E1 is the reference platform behind the planning figures in this guide: a 4×4 electric UTV with a 20 kW motor, a 72V 150Ah lithium battery, on-demand 2WD/4WD, a 2,500 lb tow rating, a 3,000 lb winch and an electric power dump bed, with a range of up to 60 miles that's best read as a travel figure. Before you buy plow hardware, ask us to verify mount and payload compatibility for your exact configuration, including blade weight and whether the lift runs off the winch or an actuator.
For the parts of a property a blade can't reach, such as roofs, gutters and walkways, Pine Country Window Cleaning's winter snow removal guide is a useful companion read for planning the whole property rather than just the driveway.
Three ways to start: request a quote through the Campus EV website, call +1 972-268-6160, or email hello@campus-ev.com with your route length, snow depth and charger location.
Campus EV builds the E1 for exactly this kind of work, with the on-demand 4WD, 3,000 lb winch and 72V lithium pack that a plow setup depends on, and we'll check blade weight, front-axle loading and cold-weather reserve against your route before you commit to hardware. Send us your driveway length, typical snow depth and where the machine parks, and we'll tell you what the setup needs. Visit Campus EV to see the E1 and request a quote.